
Hello there, have you accidentally lost or deleted something from your Mac, No Worries! Today I will tell you, How to recover deleted files on Mac even after the trash has been emptied.
It often happens with us, sometimes our younger siblings do this to us as revenge, or sometimes your friends do this to you, or sometimes you accidentally or in anger delete something that you didn’t want to delete. Here I have provided you three different methods by which you can get back your deleted data, and each method is discussed in detail.
This tutorial provides you with practical solutions on how to recover deleted files on Mac and even empty the trash bin. It is expected to recover deleted files from formatted hard drives, crashed operating systems, or even virus-infected Apple computers.
How to recover deleted files on Mac After Emptied Trash Bin?
Method 1: Restore File via Time-Machine Backup
This method usually works when you have created a backup, at some point in time in the past on a Hard-Drive that supports Time-Machine Backup. Time-Machine is Apple’s built – in-app.
First, If you want to restore specific files then:
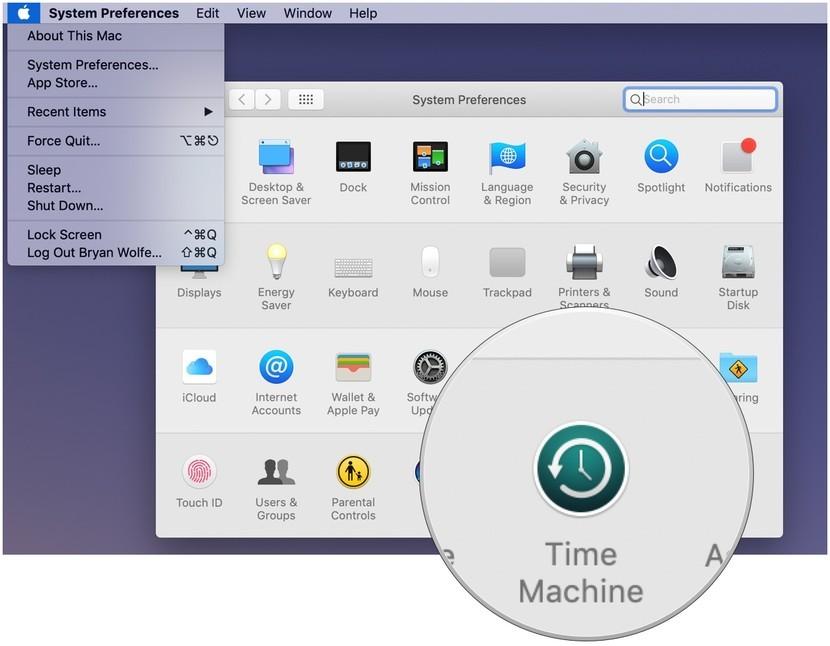
- Select system preferences from the Apple Menu. Choose the Time-Machine icon.
- Check the box next to Show Time Machine in Menu Bar.Click Enter Time Machine after clicking the Time Machine icon in the Menu Bar.Find the file or folder in question and click restore.
Voila! Time Machine will copy that file back to its original location on your Hard Drive.
Second, if you want to restore complete Hard-Drive from Time Machine backup.
Power up your Mac and hold down the command and R keys to enter the macOS Recovery Partition. Your Mac Should boot to a screen that says macOS utilities.
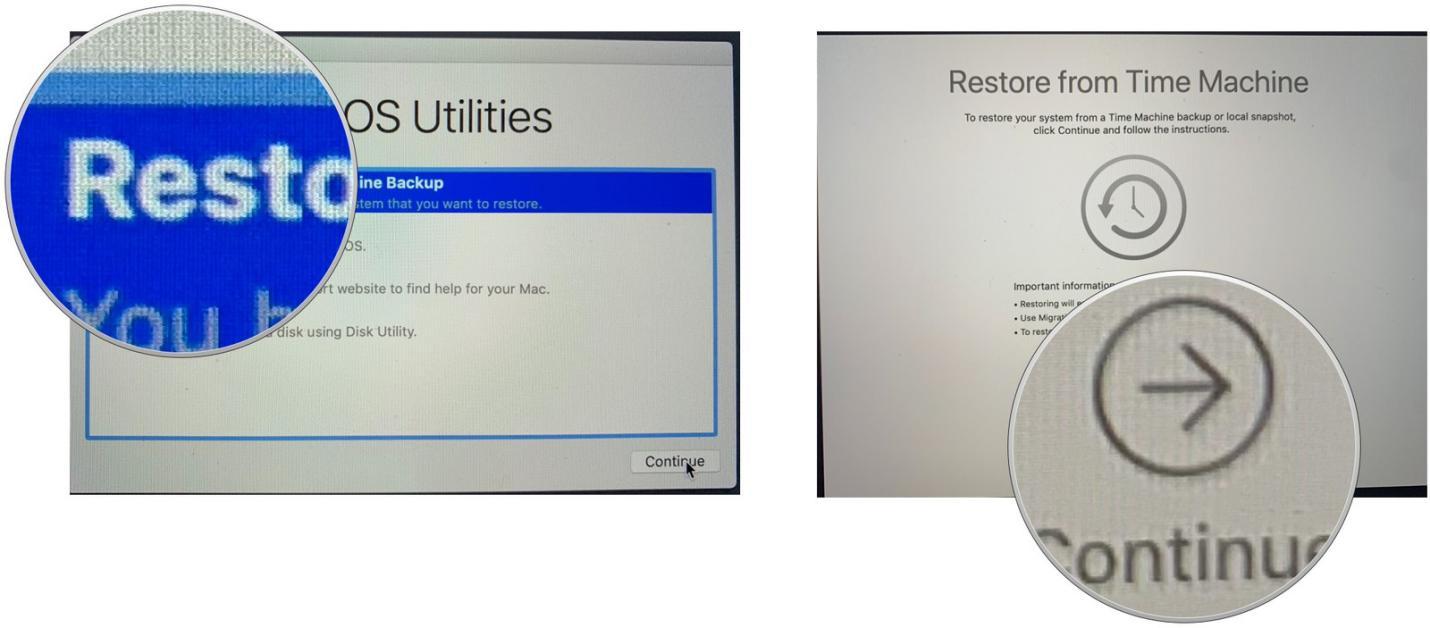
Select Restore from Time Machine BackUp and Click Continue.
Read the info on the “Restore Your System” page and click continue.
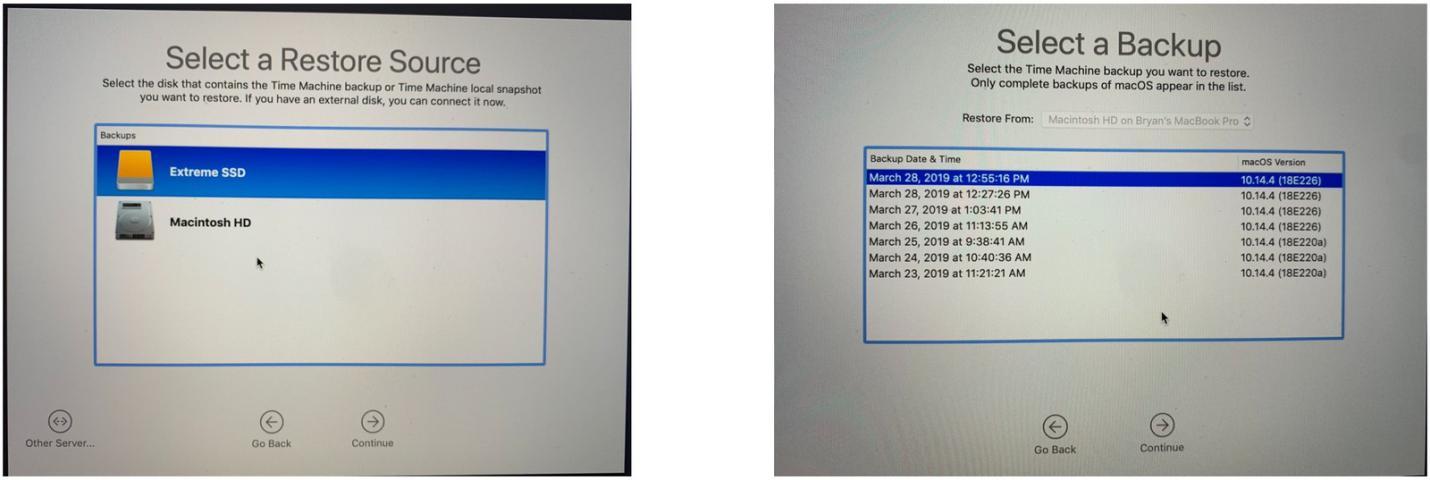
Select your Time Machine Backup and click continue.
Select the most recent backup of your Hard Disk and click continue. Your Mac will then restore the Time Machine Backup. Once it’s done it will restart.
One thing to be duly noted. Sometimes you replace your Drive that has nothing on it-not even MacOS. Then the macOS recovery partition won’t work. But you can get recovery rolling from the Time Machine itself. Just hold down the option key when you start your Mac; you’’ be able to select the Time Machine backup disk as your startup drive and go from there.
Method 2: Restore Mac Trash files via the “Put Back” option.
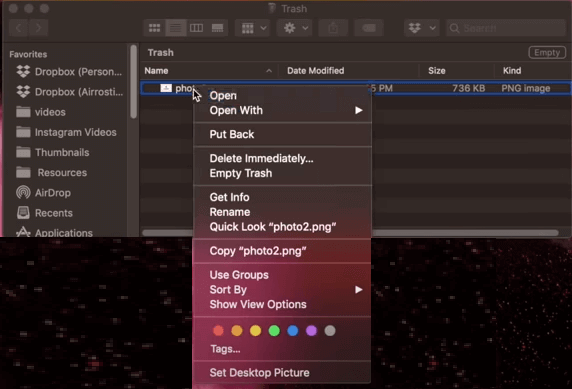
Just click on the Trash icon down in your Mac’s Dock to open a Finder window that will display the trashed files still on your Hard Drive.
Select the file or folder you wish to bring back to life, then right-click (Control-Click) on the item. A drop-down menu will appear. Click “Put Back”.
The file will be put back into the folder it was deleted from, and a new Tinder Window will open, displaying the file. The Window’s directory. You can now empty the Trash without worrying about permanently deleting the file.
There is one more way you can Put Back an item from the trash, and that is to select the file or folder in the Trash and then go to “File” – Put Back from the Menu.
Method 3: Restore Deleted files with Mac Data Recovery Software
There are plenty of software applications available in the market, some are free and some are licensed. But the normal procedures are the same in all the software. Here I have recommended EaseUS Data Recovery Wizard for Mac, one of the well-known mac data recovery software that has proved itself in Its fields. Therefore, investing time and a little money for your precious photos and data is no commercial loss. This software is something you can trust. It offers a free trial to determine if it is useful to you.
Here are the basic steps that you can follow to recover your files from the SD Card.
1.Download and install the recovery software for Mac.
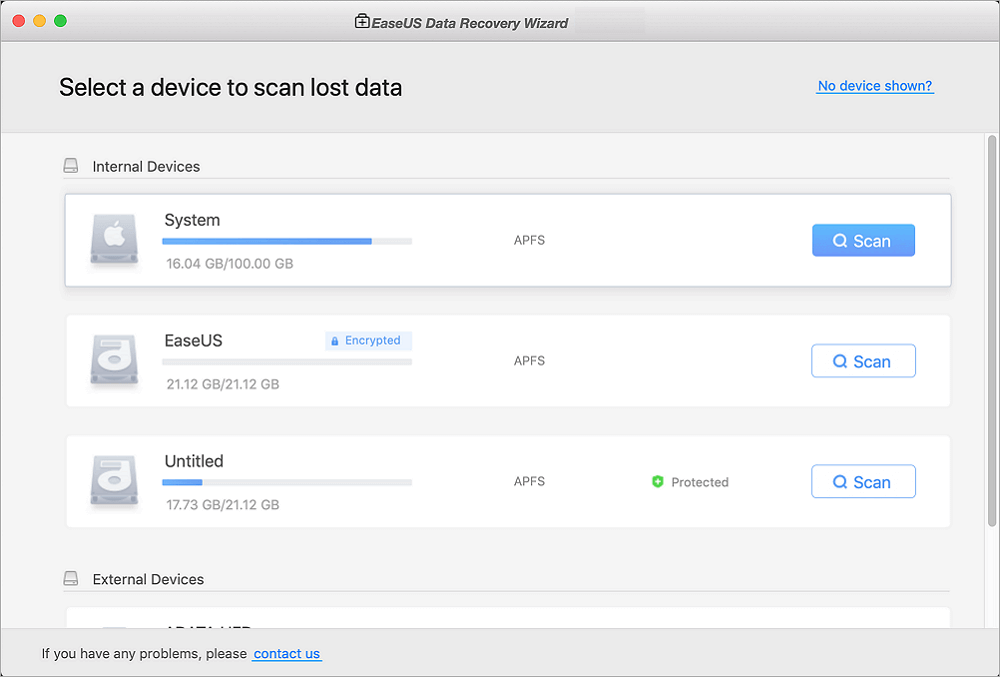
2.Launch the application and locate the storage device from which you want to recover deleted files.
- Click Recover next to the storage device to scan for lost data.
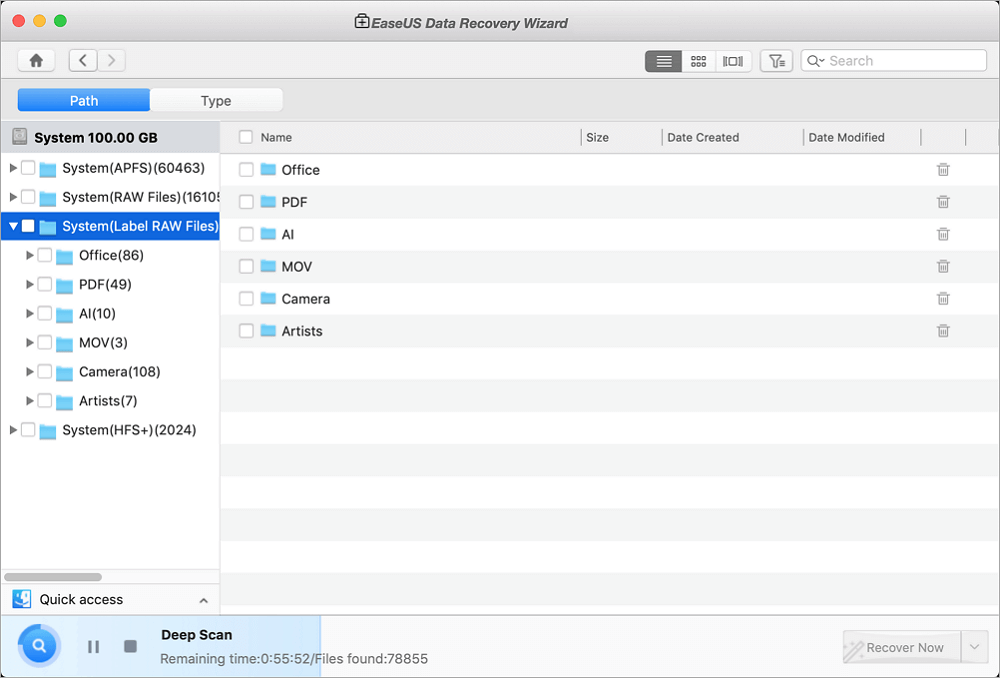
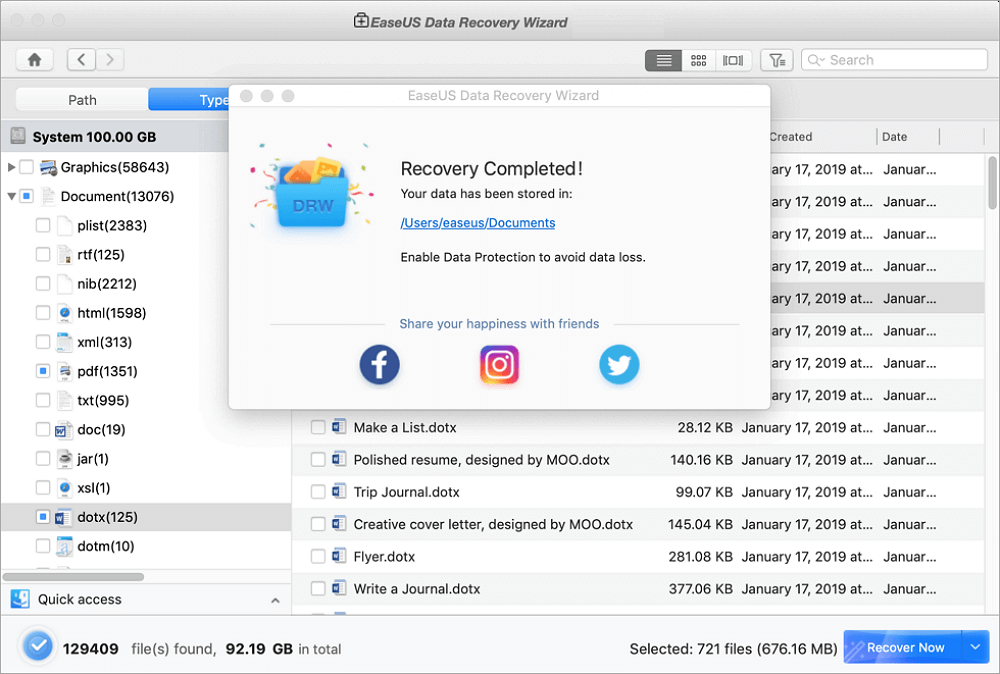
4.Preview recoverable files and select a new storage location for restored data.
5.Click to Recover again to perform the recovery.
Conclusion
Using the above Helpful tips, you can bring files back from the dead. Even if you have lost you some urgent files, you can bring back by following some easy methods. Above mentioned methods are pretty useful when it comes to recovering deleted files on your Mac device even after trash is emptied. Are these methods working for you? Please do let’s know!
SME Paid Under